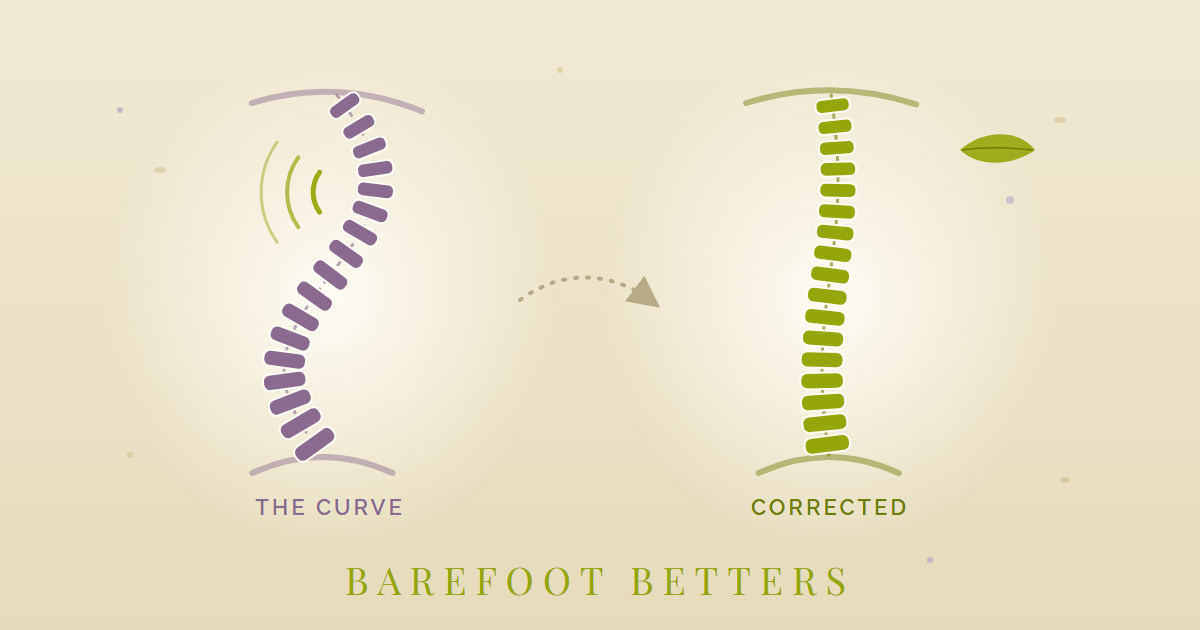
A stiff, achy mid-back is one of the most common complaints there is, and the usual first move is a few good stretches. That’s the right place to start. But if an X-ray shows scoliosis, the picture changes. A scoliosis curve isn’t just tight muscles pulling you out of line. It’s a sideways bend combined with a twist of the vertebrae themselves, and stretching alone won’t untwist it.
This post walks through both: the stretches that help a stiff mid-back, and what to do once you know there’s a structural curve underneath.
Starting stretches for the mid-back
These four loosen the area between your shoulder blades and get your upper back rotating again. They’re a good daily routine whether or not you have scoliosis.
- Foam rolling across the shoulder blades. Lie on your back with a foam roller crosswise under your upper back, hands behind your head, hips on the floor or lifted. Roll slowly from the bottom of your shoulder blades to the top. Pause on stiff spots and let your upper back extend over the roller. Stay off your lower back.
- Thread the needle. On hands and knees, slide one arm under your body along the floor, palm up, until your shoulder and the side of your head rest down. Breathe there, then reach that same arm up toward the ceiling and follow it with your eyes. Switch sides.
- Open book. Lie on your side with your knees bent and stacked, arms straight out in front of you, palms together. Keep your knees down and sweep the top arm up and over to the other side, rotating your chest open like a book. Follow your hand with your eyes. Return slowly. Switch sides.
- Cat-cow. On hands and knees, round your back up toward the ceiling and tuck your chin (cat), then let your belly drop and lift your chest and gaze (cow). Move slowly with your breath, and put most of the motion into your mid-back.
The 10-minute foam roller spinal stretch
The crosswise roll above works one spot at a time. This one has you lie lengthwise along the roller and stay there, so the whole spine and the front of the chest open up slowly. It comes from the Physio REHAB video The 10 minute foam roller spinal stretch, featuring Tim Keeley. It’s aimed at a rounded upper back and the tight chest and shoulders that come with sitting at a desk.
- Get on the roller. Lie on your back with the roller running the length of your spine, so your head and tailbone are both on it. Knees bent, feet flat.
- Set your low back. You want only a small gap under your lower back. Press a little weight through your heels and rock your pelvis back slightly to flatten it a bit. Don’t press it hard into the roller.
- Lengthen your neck. Keep your head long on the roller, chin level. If your upper back is very rounded and that’s hard, raise your head a little rather than let it tip back.
- Ribs down. Tighten your stomach muscles lightly so your lower ribs don’t flare up toward the ceiling. That keeps the stretch in your upper back instead of arching your lower back.
- Arms out. Rest your arms out to the sides, palms up, with the backs of your hands and elbows touching the floor.
- Slide up slowly. Inch your arms up toward your head, like a slow snow angel, keeping hands and elbows on the floor. When they start to lift, that’s your spot. Stop there, keep your shoulders down away from your ears, and breathe. You’ll feel it across the front of your chest and shoulders.
- Stay. Start with about 2 minutes and build toward 10 over the weeks. It doesn’t have to be every day. Come off slowly, rolling to one side.
If your hands get pins and needles or go numb, slide your arms back down until it stops. A strong stretch is fine. Afterward you should feel warm and loose between your shoulder blades, and it’s easier to sit and stand tall.
If the stiffness eases and stays gone, good. If it keeps coming back, or one shoulder blade sticks out, one shoulder sits higher, or your clothes hang unevenly, it’s worth finding out whether there’s a curve.
What changes once the X-ray shows a curve
Scoliosis is defined as a sideways curve of at least 10 degrees, measured on an X-ray as the Cobb angle, and it comes with rotation of the vertebrae (Negrini 2018). That rotation is why one side of the rib cage bulges at the back while the other side flattens or hollows.
Stretching works on muscle length. It can’t reverse a rotation built into the bones and discs. What can help is training your body to actively hold a more corrected position, breathe into the collapsed side of the rib cage, and build the muscle endurance to keep that posture through the day. That’s what the Schroth method is built to do.
What the Schroth method is
The method was developed in Germany in the 1920s by Katharina Schroth, who had scoliosis herself, and later built out by her daughter, Christa Lehnert-Schroth, a physical therapist. It’s the best-known of the physiotherapeutic scoliosis-specific exercise approaches, called PSSE for short.
A few things set it apart from general stretching or core work:
- It’s set up for your particular curve. Your therapist classifies your curve pattern (where the main curve is, which way it bends, which way it rotates) and picks exercises that push against your curve, not a generic one. Two people with scoliosis can get opposite exercises.
- Corrective breathing. Called rotational angular breathing, it means breathing deliberately into the hollow, compressed side of your rib cage to help expand and de-rotate it.
- Elongation and corrective postures. You lengthen the spine first, then shift and rotate your trunk out of the curve, often using a mirror, wall bars, cushions, or wedges to feel what “corrected” is.
- Carrying it into daily life. The goal is to sit, stand, and move in the corrected position, not just hold it during exercises.
Similar methods worth knowing
The SOSORT guidelines, the main international consensus on non-surgical scoliosis treatment, list several PSSE approaches with published evidence behind them (Negrini 2018). Besides Schroth, the ones you’re most likely to come across:
- SEAS (Scientific Exercise Approach to Scoliosis), from Italy. Built around active self-correction you practice in ordinary positions. Of these, it’s the easiest one for adults to fit into a normal day, because the correction is meant to become part of how you sit and stand, not a separate hour-long session.
- Lyon, from France. Often paired with bracing, with exercises focused on mobility and posture.
- FITS (Functional Individual Therapy of Scoliosis), from Poland.
- DoboMed, also from Poland. Pairs breathing with three-dimensional self-correction of the curve.
- Side-Shift, from the UK. A simple sideways shift of the trunk against the curve, practiced often through the day.
You’ll also see BSPTS (Barcelona Scoliosis Physical Therapy School), also called the Rigo Concept. It grew out of Schroth and uses its own, more detailed curve classification. Many U.S. therapists trained in “Schroth” are actually certified through BSPTS or ISST, which is fine. Both are Schroth-based.
What to expect as an adult
Be realistic going in. Most of the strong research on Schroth is in teenagers who are still growing. In two 2016 randomized trials, adolescents doing supervised Schroth exercise reduced their curve by roughly 2.5 to 4 degrees more than those who didn’t (Kuru 2016; Schreiber 2016). That’s real, but it’s modest, and it happened in growing spines.
Adult spines are done growing, so the structure changes less. For adults, the main benefits are:
- Less pain. This is the most common reason adults start, and the most common improvement.
- Better posture. Shoulders, rib cage, and hips sit more level.
- Better balance and breathing. Opening the compressed side of the rib cage can make a deep breath easier.
- Keeping the curve from getting worse. Adult curves can creep forward slowly over the years, and building the strength to hold a corrected posture is how you push back.
The spine itself usually straightens only a little. Go in for how you feel and move, and count any change on the X-ray as a bonus.
Strengthening your back with bands
Holding a corrected posture all day takes muscle endurance, and a set of resistance bands is all you need to build it at home. These exercises come from Jeff Cavaliere’s ATHLEAN-X video Build a Big Back with Bands (NO WEIGHTS!). He splits the back into four zones and hits each one, which matters here, because the mid and lower traps and the low back are the areas most routines skip.
Before you start: set up tall and long first, the way you would for a Schroth exercise, then pull. Watching yourself in a mirror helps. A few of these are one-arm moves. Do both sides, and ask your therapist whether to give one side extra sets for your curve.
Zone 1: lats (back width)
- Pull-up, assisted or loaded. Loop the band over the bar and step into it to take some of your body weight off. To make it harder, anchor the band to a loaded backpack on the floor, step into it, and run the band around the back of your neck.
- Band row. Stand on the band with your feet wide, grab both sides of the band in each hand so the band is doubled, hinge forward, and row. The wide stance and doubled grip are what make it heavy enough to count.
- High-to-low kneeling row. Anchor the band high and out in front of you. Kneel, take it in one hand, and pull down and back, driving your elbow behind your body. The pull runs at an angle, the same direction the back’s muscle fibers run. You can always pull one more inch for a harder finish.
- Two-for-one row. Anchor the band low. Row it back with one arm and hold that arm there. Then grab the top part of the band with your other arm and row it back to meet the first, trying to bring both elbows together behind you. It teaches you to feel your back doing the work.
- Straight-arm pushdown. Anchor the band high. With your arms straight, drive your hands down to your sides as hard as you can. Keep your elbows locked so your lats do the work, not your triceps.
- Pullover, elbows flared. Same idea, from overhead, but let your elbows flare out. Moving them out and down toward your sides, even 8 to 10 inches, is what works the lats.
Zone 2: mid and lower traps, rhomboids (back thickness)
- Zeus row. Anchor the band high, lean your body forward, and row with a narrow grip. The narrow grip takes the lats out of it and puts the work into the rhomboids and the mid and lower traps, the muscles that pull your shoulder blades back and down.
- Wraparound row. Use a wide anchor (standing on the band with your feet wide works) and cross your grip, left hand over right, right over left. That lets your shoulder blades spread forward at the start, so your mid back gets a full stretch before you row.
Zone 3: upper traps
- Banded shrug. Stand on the band and shrug straight up. Shorten the band between your hands and your feet to raise the tension.
- Lying face pull. Lie on your back with the band anchored behind your head, and pull your hands back and down toward the floor beside your head as far as they’ll go. Hold 1 to 2 seconds at the bottom of every rep. The floor gives you a target, so you know you’ve finished each rep. It also works the rotator cuff and the muscles around your shoulder blades.
Zone 4: low back
- Good morning. Stand on the band with it looped across the back of your neck. Hinge at your hips, pushing them back, rather than just bending over to touch your toes. Done right, your glutes and low back work together.
- Superman press-out. Anchor the band around your feet and lie face down, holding the band. Lift your thighs and chest just off the floor while you reach your arms overhead against the band. It works your whole back side at once, from your glutes and low back up to your lower traps.
Finding a certified therapist in the Las Vegas Valley
Schroth-certified clinics are thin on the ground here. The one practice we found that serves the valley is Scoliosis Basics, an in-home, cash-based practice covering Las Vegas, Summerlin, Henderson, Boulder City, and the surrounding areas. Its therapist, Dr. Dennis Gutierrez, PT, DPT, lists training in BSPTS (Rigo), Schroth, SEAS, and Lyon, and the practice treats adults. It’s out-of-network for insurance, so ask about pricing up front. North Las Vegas isn’t on its listed service area, so call and ask.
Beyond that, search the therapist directories directly:
- BSPTS (Rigo Concept): bspts.net therapist listings
- ISST (International Schroth 3D Scoliosis Therapy): ISST Schroth therapist listing
Or call physical therapy clinics and ask plainly: “Do you have a therapist certified in Schroth, BSPTS, or SEAS? What level of certification, and do you treat adults?” A therapist who’s taken a weekend intro course isn’t the same as one who’s fully certified.
What to bring to your first visit
A therapist needs to know your curve to pick the right exercises. Before your first appointment, get these from your X-ray report (or ask the office that took the X-ray):
- The Cobb angle of each curve, in degrees.
- Where each curve is (thoracic, thoracolumbar, or lumbar) and which way it bends (for example, “right thoracic, left lumbar”).
- Which way the vertebrae rotate, if the report says.
- The images themselves, not just the written report. A trained therapist will want to see them.
Reading and video
- The book: Three-Dimensional Treatment for Scoliosis: A Physiotherapeutic Method for Deformities of the Spine by Christa Lehnert-Schroth (Martindale Press, English edition, ISBN 978-0914959021). It’s the method’s source text, written by the founder’s daughter. It’s dense and clinical, but it shows the postures and the reasoning behind them.
- YouTube: search “Schroth exercises for adults” and stick to videos made by certified therapists. Check the channel or description for Schroth, BSPTS, ISST, or SEAS certification. Use videos to learn the ideas and practice between sessions, not to pick your own corrections, since those depend on your specific curve.
Sources
- Negrini S, et al. 2016 SOSORT guidelines: orthopaedic and rehabilitation treatment of idiopathic scoliosis during growth. Scoliosis and Spinal Disorders. 2018;13:3.
- Kuru T, et al. The efficacy of three-dimensional Schroth exercises in adolescent idiopathic scoliosis: a randomised controlled clinical trial. Clinical Rehabilitation. 2016;30(2):181–190.
- Schreiber S, et al. Schroth physiotherapeutic scoliosis-specific exercises added to the standard of care lead to better Cobb angle outcomes in adolescents with idiopathic scoliosis: an assessor and statistician blinded randomized controlled trial. PLoS ONE. 2016;11(12):e0168746.
- Lehnert-Schroth C. Three-Dimensional Treatment for Scoliosis: A Physiotherapeutic Method for Deformities of the Spine. Palo Alto: Martindale Press. ISBN 978-0914959021.
- Scoliosis Basics, LLC: Clark County, NV and About.
- BSPTS: therapist listings.
- ISST Schroth: ISST Schroth therapist listing.
- Physio REHAB, featuring Tim Keeley, YouTube: The 10 minute foam roller spinal stretch.
- Jeff Cavaliere, ATHLEAN-X, YouTube: Build a Big Back with Bands (NO WEIGHTS!).
Simplify, create, and live with God in your heart.